Swift: How to Install and Configure SwiftLint


SwiftLint is an open-source tool used to enforce styles and conventions.
Installing it is not difficult, but someone might need a few hints, so I have prepared this blog post to explain them.
For this guide I have taken inspiration from the YouTube video Learn how to add SwiftLint to your iOS Apps.
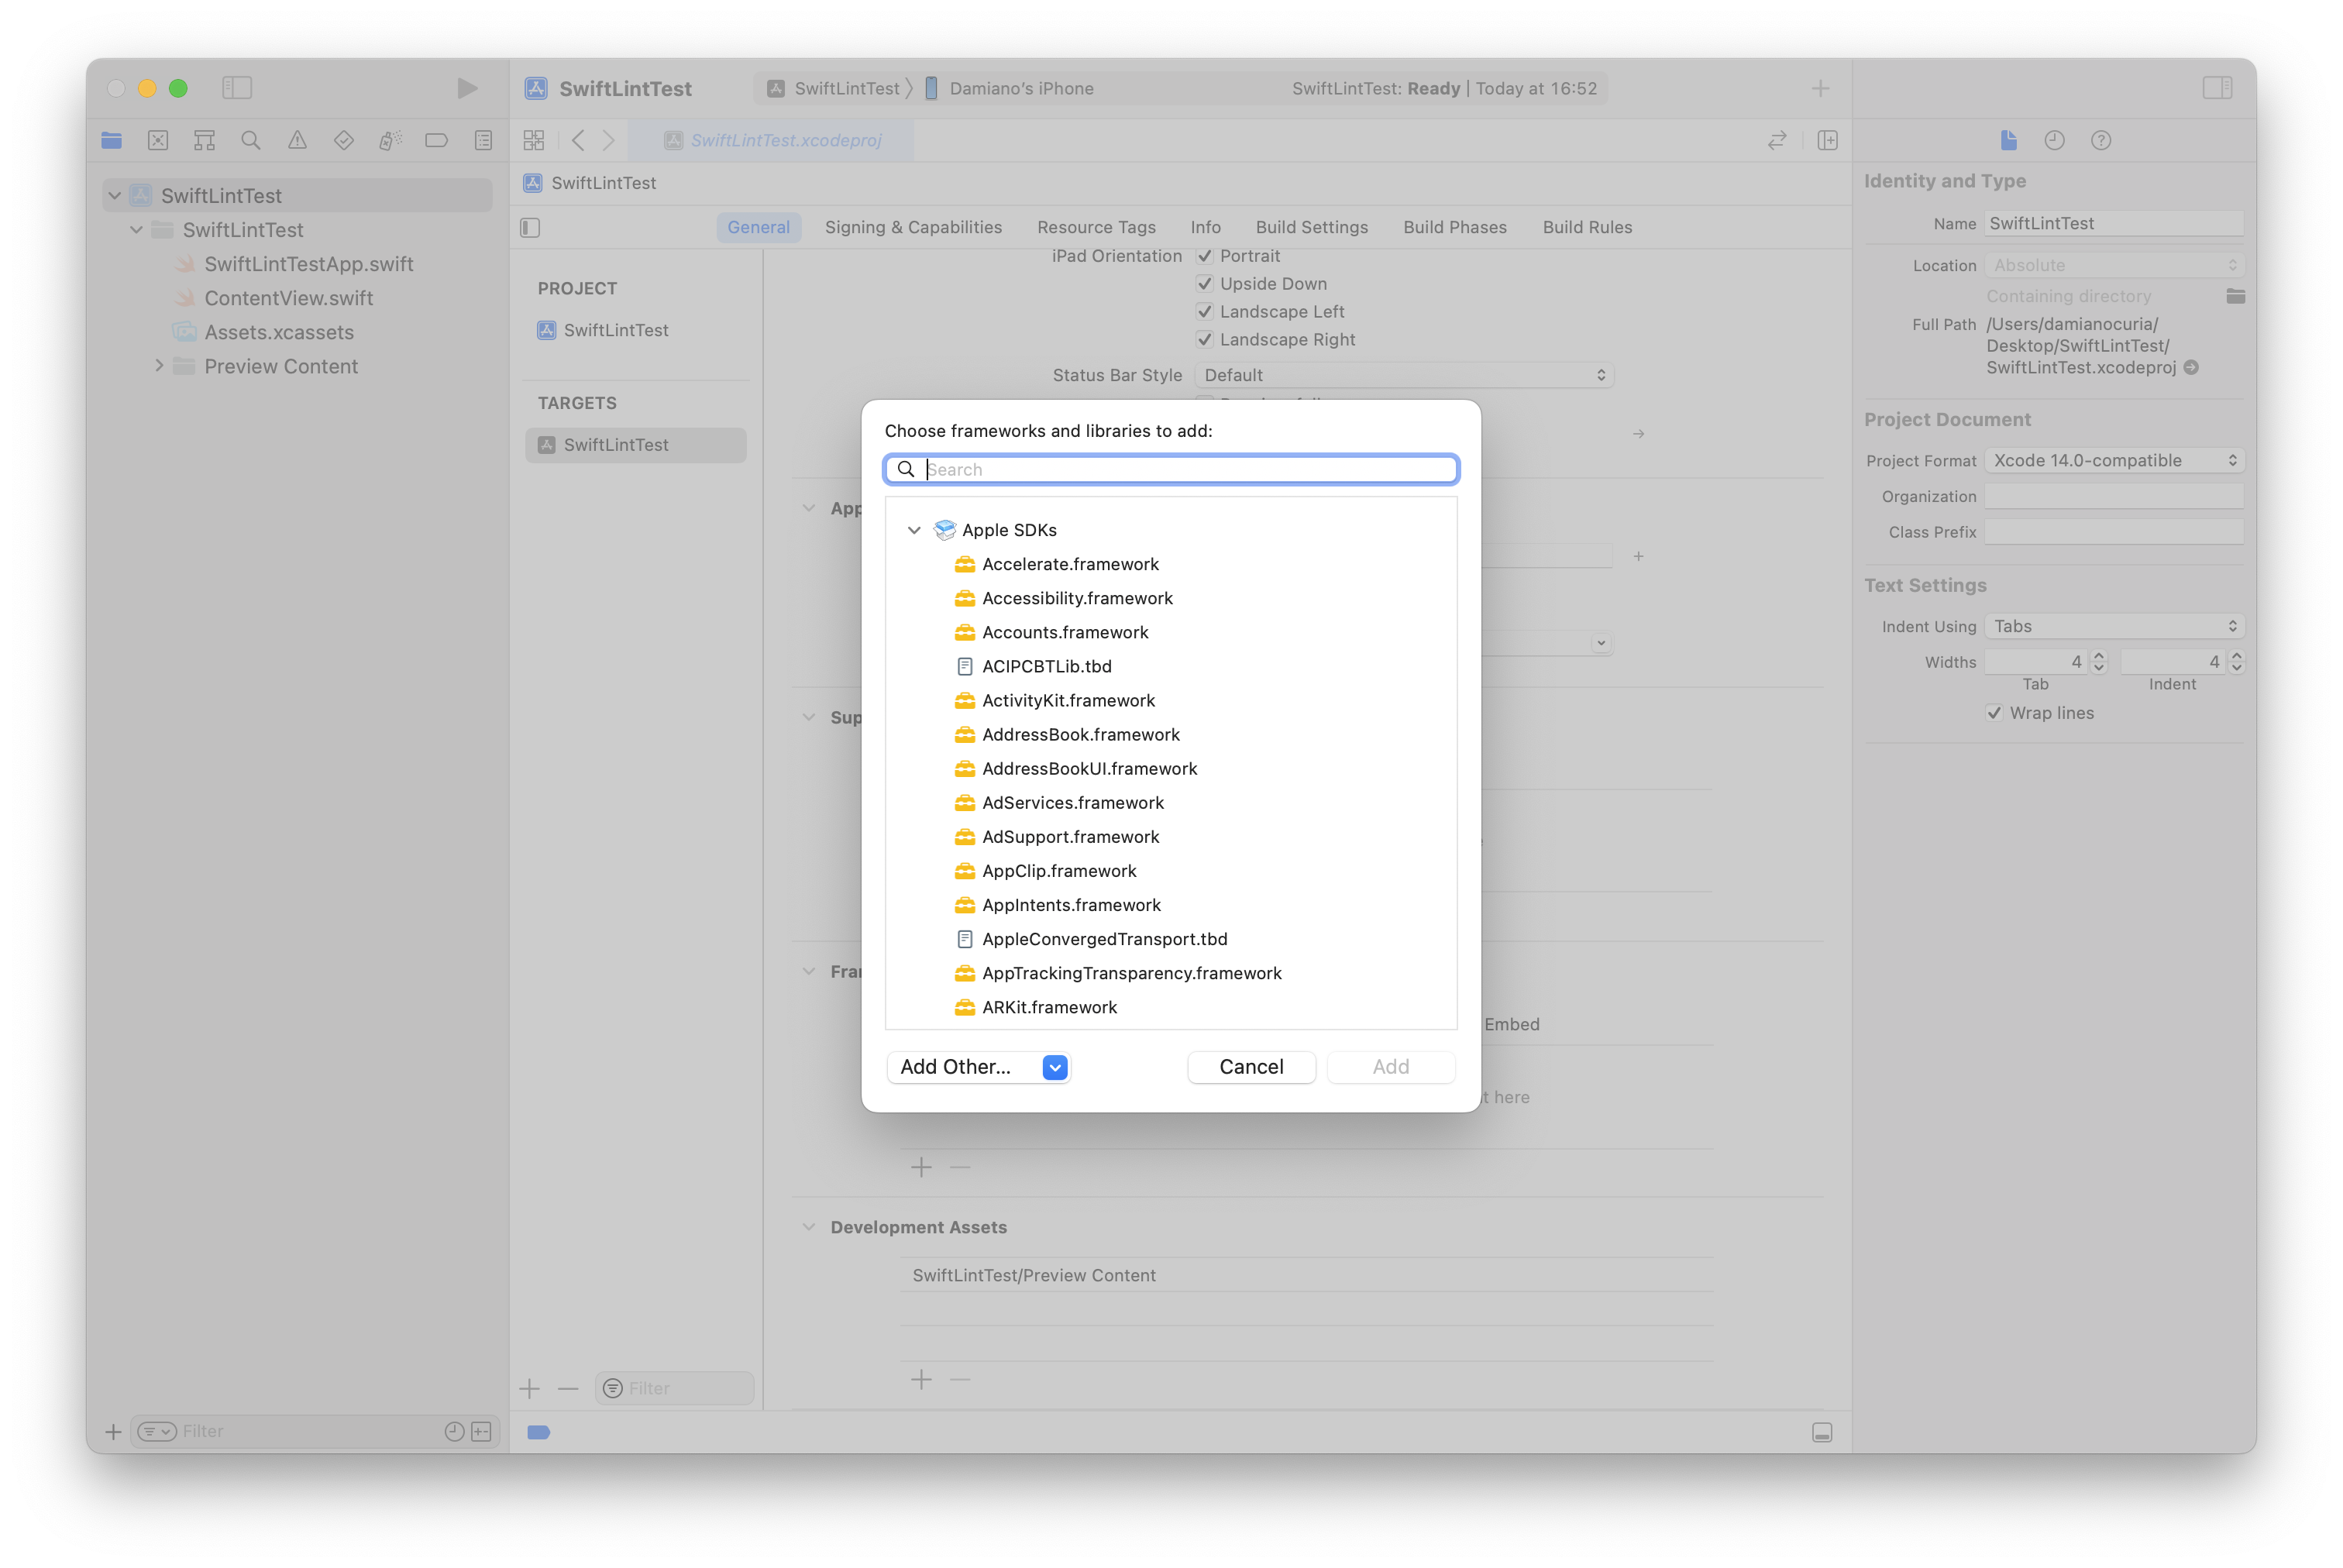
From the project settings, choose one Target, and from the General tab, scroll down to Framework, Libraries and Embedded Content, click on the Plus button:
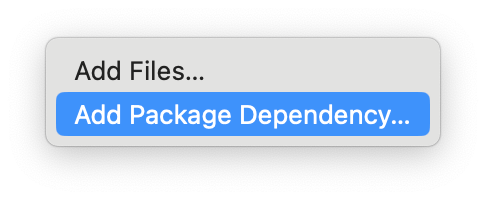
In the bottom left corner, Add Other..., choose Add Package Dependency:
In the top right search box, insert the GitHub repo url of SwiftLint: https://github.com/realm/SwiftLint:

Then click the Add Package button, and press a second time the Add Package button:
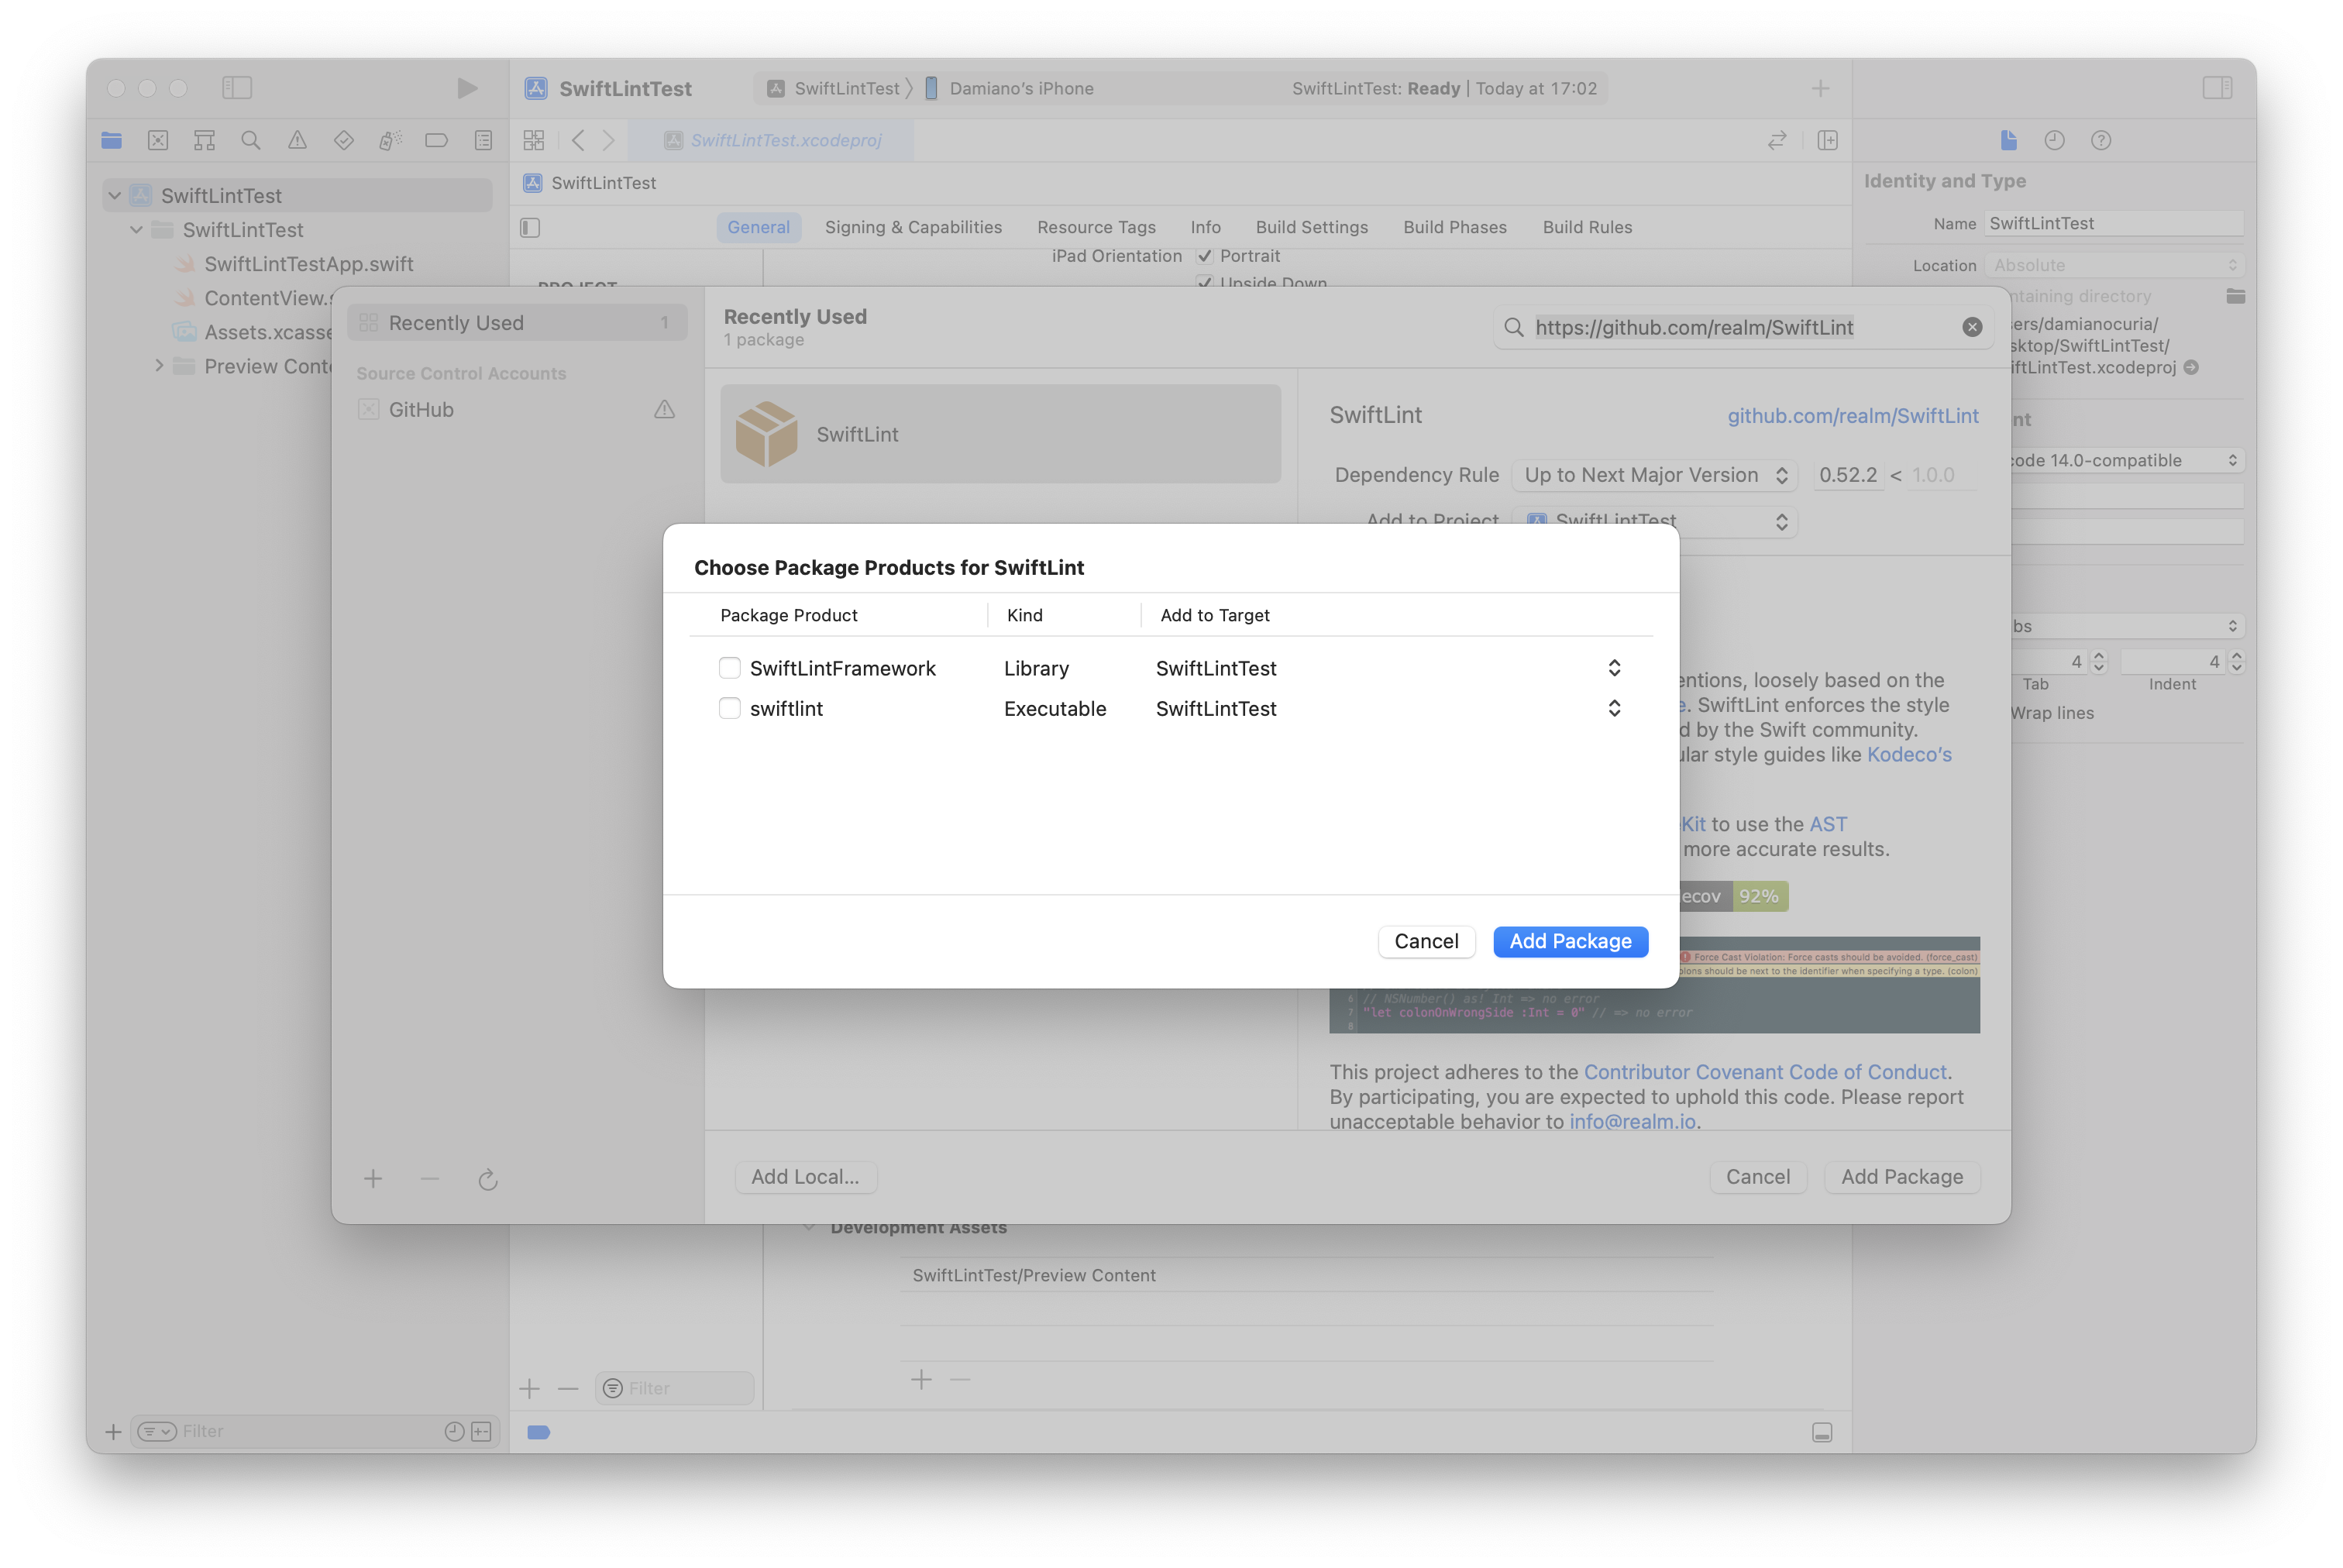
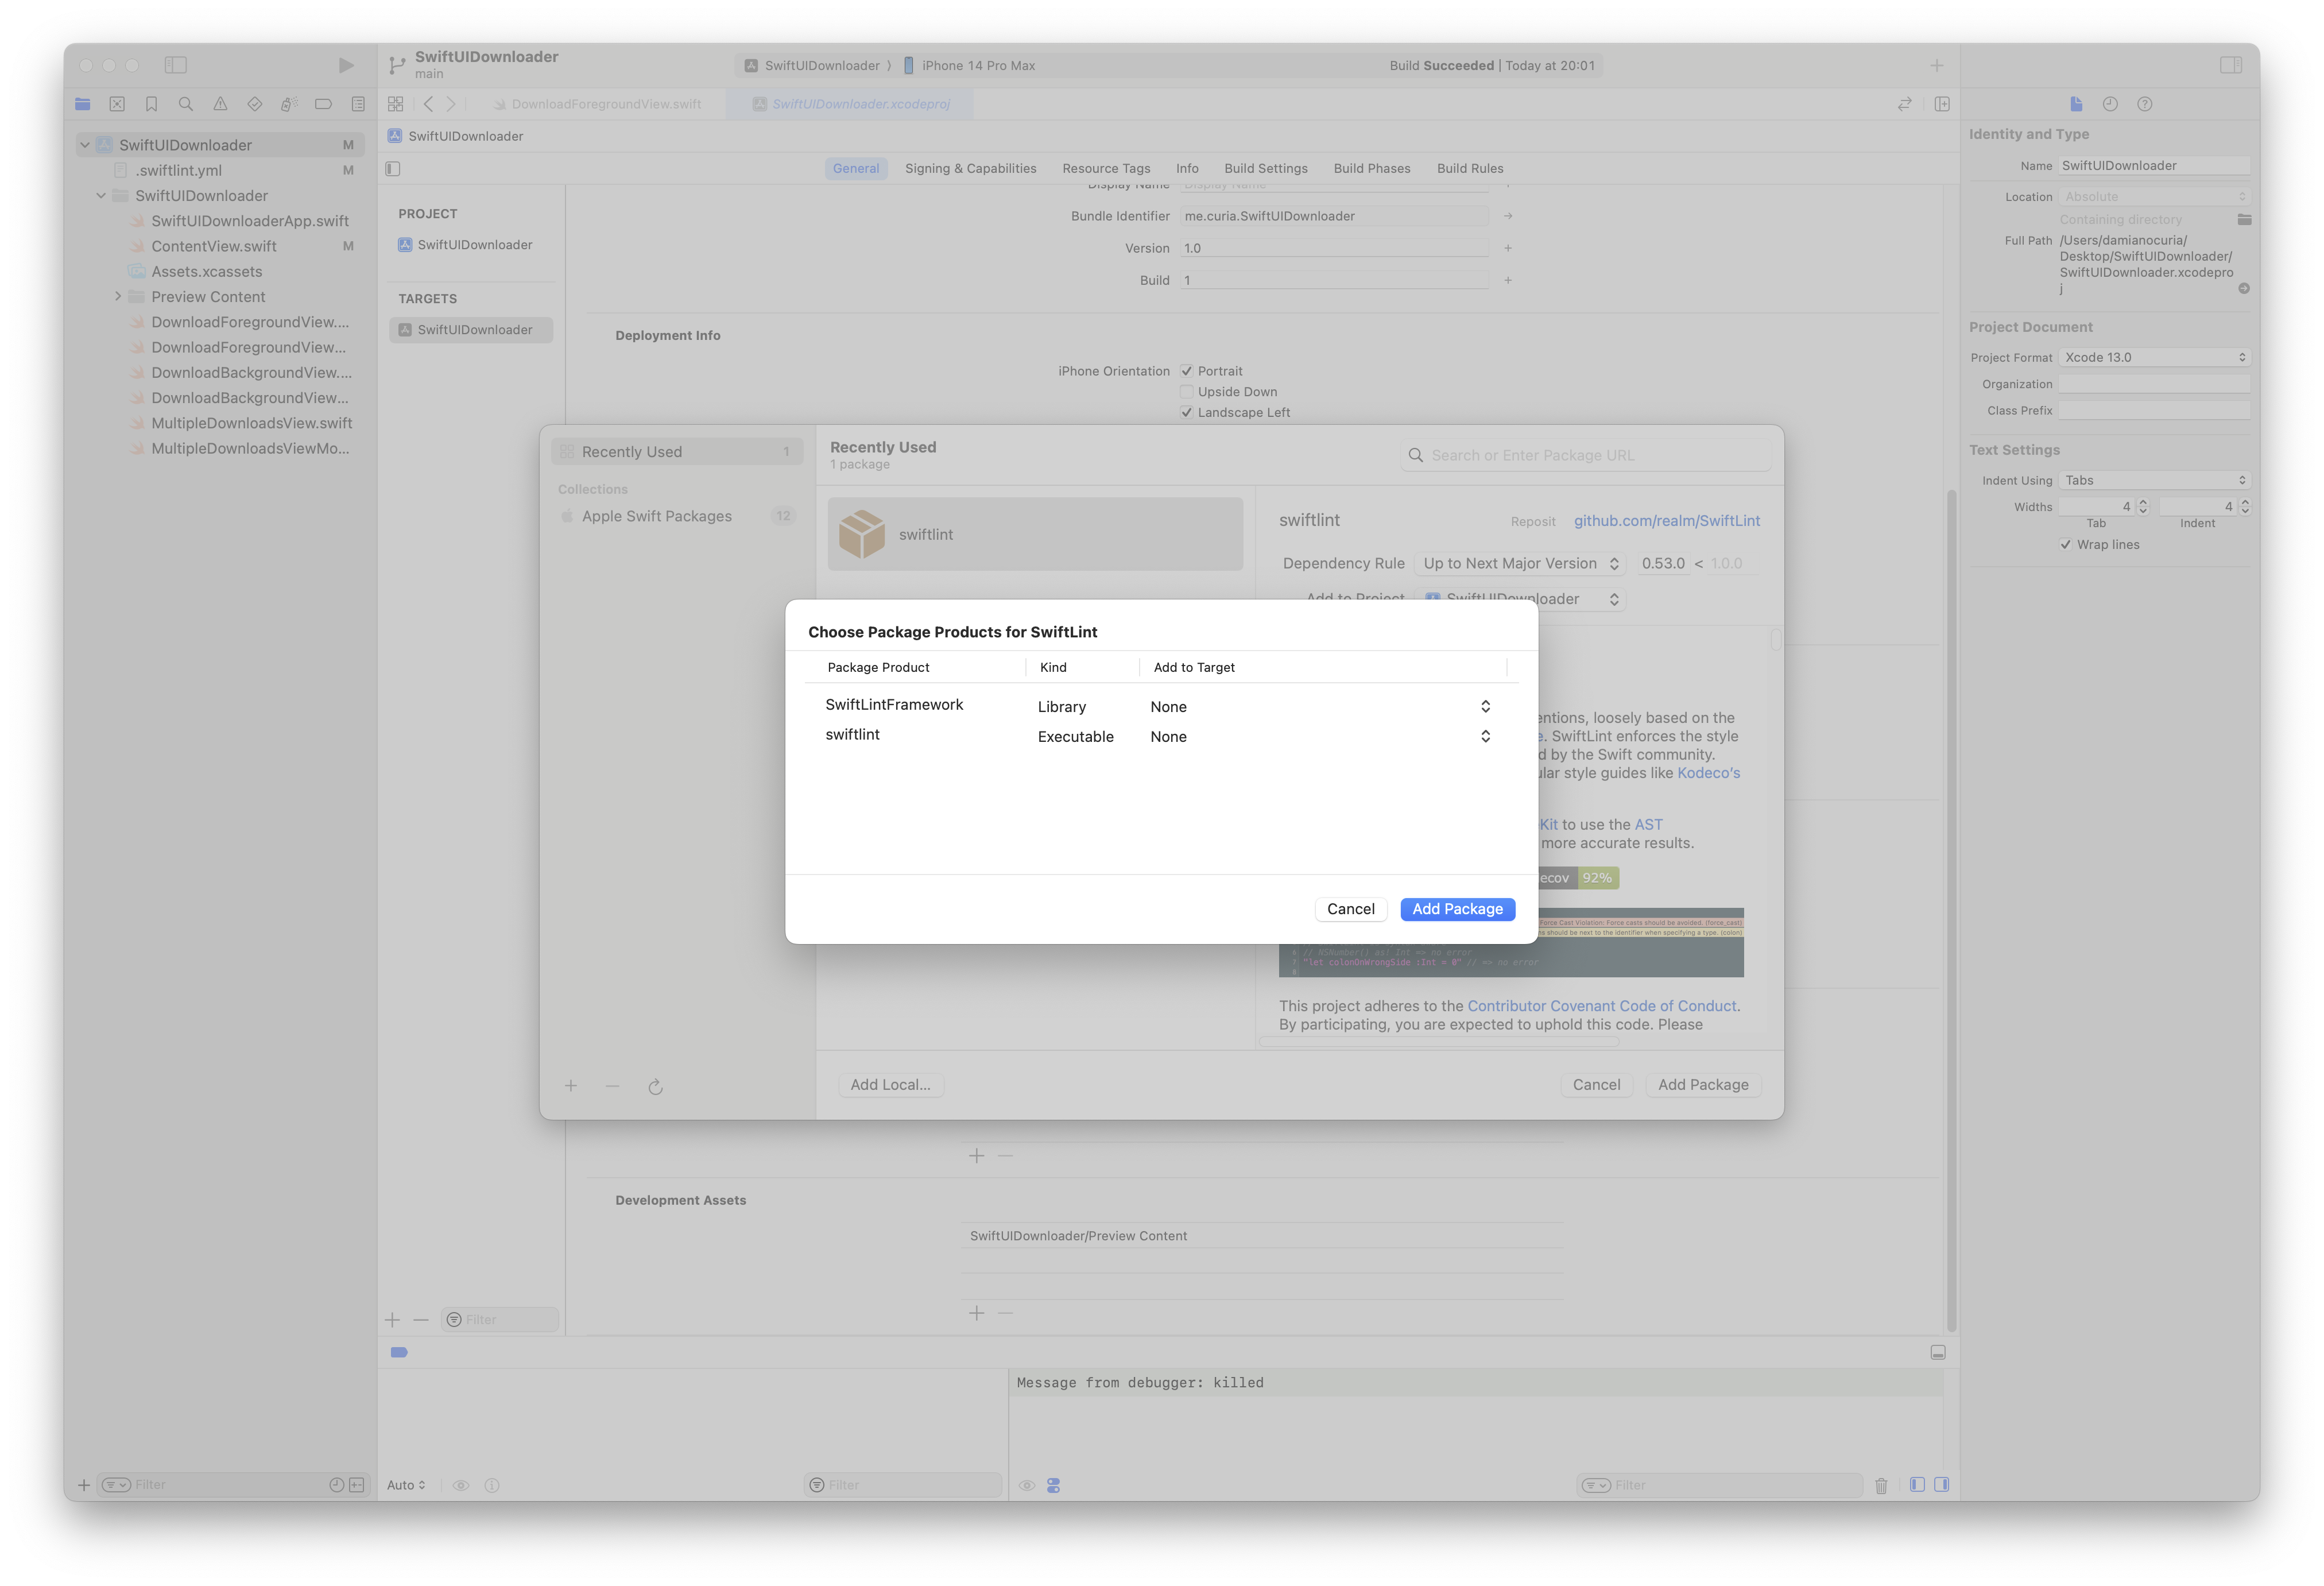
Note: starting from SwiftLint 0.53.0 the packages can't be added to the Targets. In old versions of Xcode do not check the two checkboxes (like in the picture above), while in newer versions of Xcode select None as target (like in the picture below):
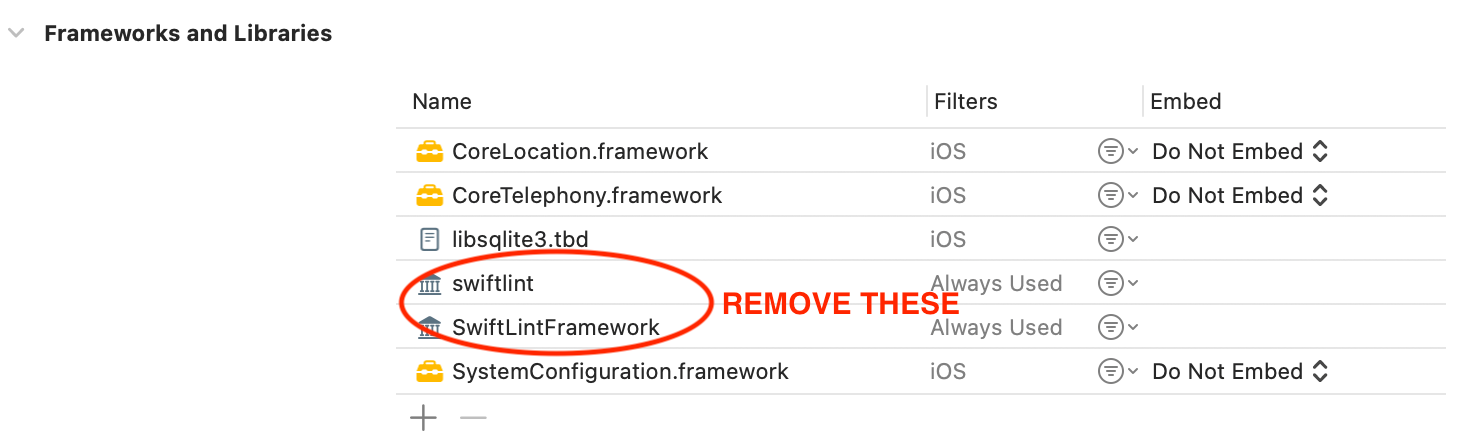
Note: in case you face issues about SwiftLint not supported in iOS projects, remove SwiftLint from Framework and Libraries:
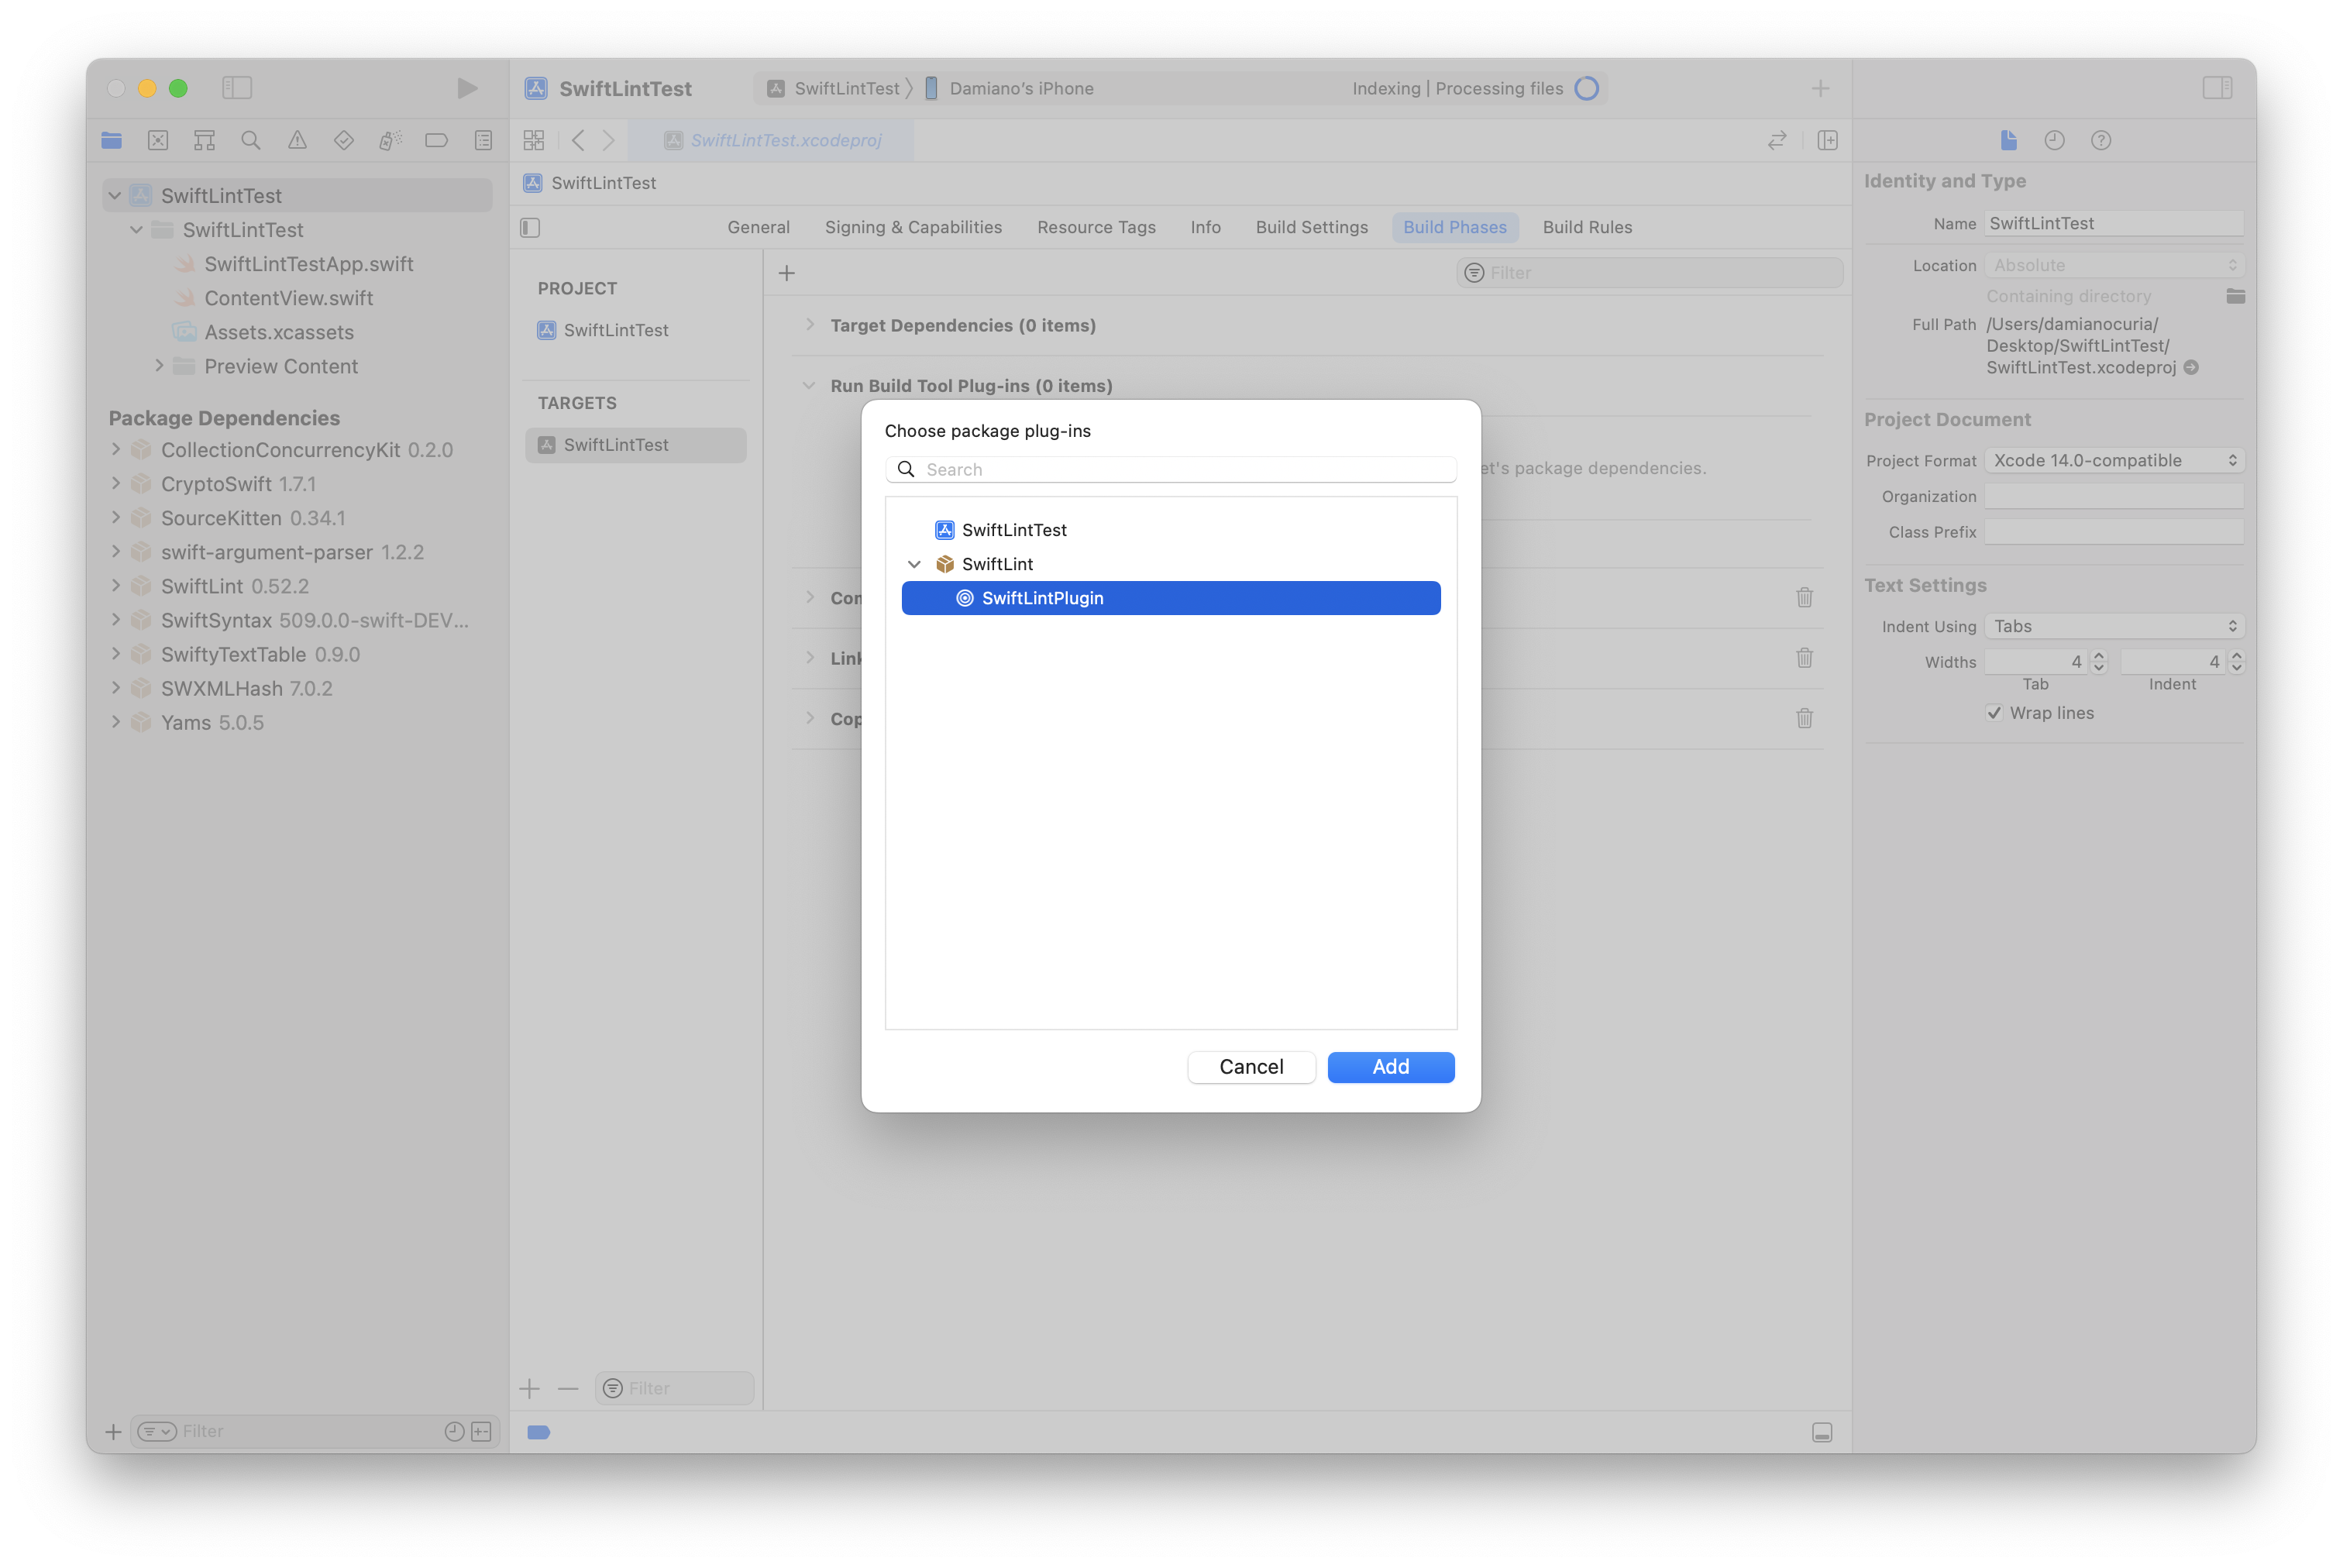
Now go to the Build Phases tab, Run Build Tool Plug-ins, click on the Plus button, choose SwiftLintPlugin and press the Add button:
Now you can run the build. It's possible that at this point you will be asked to trust the plugin.
Finally, there are a couple of tasks that might be interesting for you:
- you can suppress single instances of the rules with
// swiftlint:disable <rule1> [<rule2> <rule3>...] The rules will be disabled until the end of the file or until the linter sees a matching enable comment: // swiftlint:enable <rule1> [<rule2> <rule3>...] - it's possible to configure rules at global level adding a .swiftlint.yml file in the project folder. A sample file is included in the linked documentation.