My Smart Home: Logitech Harmony integration via Homebridge

In my previous posts I have given an introduction to my smart-home setup and described the setup of my Philips Hue lights and Eve door sensors. Finally I have concluded with the HomeKit setup.
In this post I will describe the integration of devices that don't natively support HomeKit.
Introduction
I have already explained in my introduction post, and then again the other one focused on HomeKit, about the security and certification requirements that the manufacturers must go in order to make their devices compatible with HomeKit.
In some cases these integrations are announced and take some time, while in other cases there is no information about it.
Luckily there is a solution that allows to integrate some of these devices: Homebridge.
Homebridge is a NodeJS application that acts as a server, that acts like a bridge between the HomeKit server in your home and the external devices.
As Node.js is very portable, you can deploy it in almost any server you might have: a Windows PC, an Apple Mac, a Raspberry Pi or even some NAS supporting Docker, for example Synology.
I would say, during setup and configuration, Windows PCs and Apple Macs are very easy to install and configure (see configuration section later).
But these are also the least adapt for a running server. As I don't own any NAS, I have chosen the Raspberry Pi way, and I will describe here my setup.
Raspberry Pi setup
Even if you have a Pi, it's always better to re-install it to update the operative system and its software.
For the reset, I have followed the official Raspberry Pi Documentation - Getting Started:
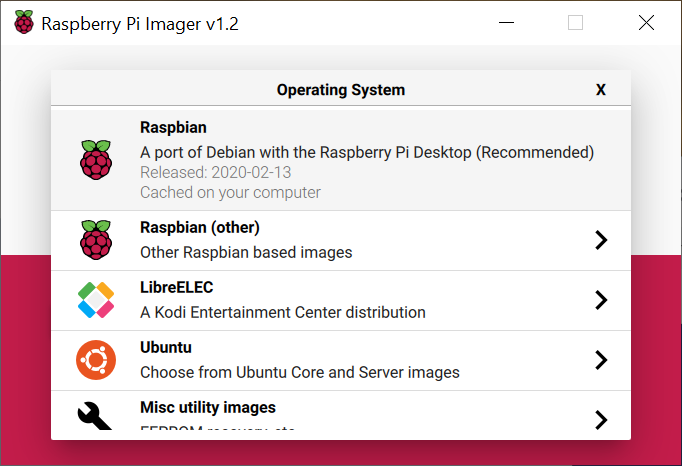
- Download the latest version of Raspberry Pi Imager and install it.
- Connect an SD card reader with the SD card inside.
- Open Raspberry Pi Imager and choose the required OS from the list presented.
- Choose the SD card you wish to write your image to.
- Here you can also customize the installation:
- configuring the hostname (raspberrypi.local by default),
- enabling SSH,
- setting username and password,
- configuring the Wi-Fi Lan;
- setting locale and keyboard.
- Review your selections and click 'WRITE' to begin writing data to the SD card.
At this point, you can connect keyboard and monitor to the Pi, and run the following commands:
whoami
hostname -I
This should return the user pi and your local IP address, in my case 192.168.1.111.
What I did, in reality, was to search for the DHCP registration in my router and find the IP address of the Pi, without ever needing to connect keyboard and monitor.
Once got the IP, it's possible to connect to the Pi Pi from your Windows Pc or Apple Mac with:
ssh pi@192.168.1.111
Note: the raspberry pi registers itself in the DHCP and so it is possible to directly do this:
ssh pi@raspberrypi
where you will be asked your previously configured password.
Homebridge setup
For the Homebridge installation, I have followed the official documentation Install Homebridge on Raspbian.
Install Node.js
Install the LTS version of Node.js from the official repository, as well as additional dependencies, following the Installation Instructions:
# setup repo
curl -sL https://deb.nodesource.com/setup_18.x | sudo bash -

# install Node.js
sudo apt install -y nodejs gcc g++ make python

# test node is working
node --version

# test npm is working
npm --version

# upgrade npm
sudo npm install -g npm
Install Homebridge and Homebridge Config UI X
Install Homebridge and Homebridge Config UI X using the following command:
sudo npm install -g --unsafe-perm homebridge homebridge-config-ui-x
To setup Homebridge as a service that will start on boot you can use the provided hb-service command.
sudo hb-service install --user homebridge
This command will do everything that is required to setup Homebridge and the Homebridge UI as a service on your system, it will create the homebridge user if it does not already exist, and create the default Homebridge config.json under /var/lib/homebridge if it does not already exist.
When setting up Homebridge as a service using this command, the UI will stay online even if Homebridge is crashing due to a bad plugin or configuration error.
Login to Homebridge Config UI X
The Homebridge Config UI X web interface will allow you to install, remove and update plugins, and modify the Homebridge config.json and manage other aspects of your Homebridge service.
Login to the web interface by going to http://< ip address of your server>:8581, for example in my case it is http://192.168.1.111:8581.
Or, if you use the DHCP registration, go to http://raspberrypi:8581.
The default user is admin with password admin.
Here you will have a nice UI where you can monitor your Homebridge installation very conveniently from your browser on your local computer:
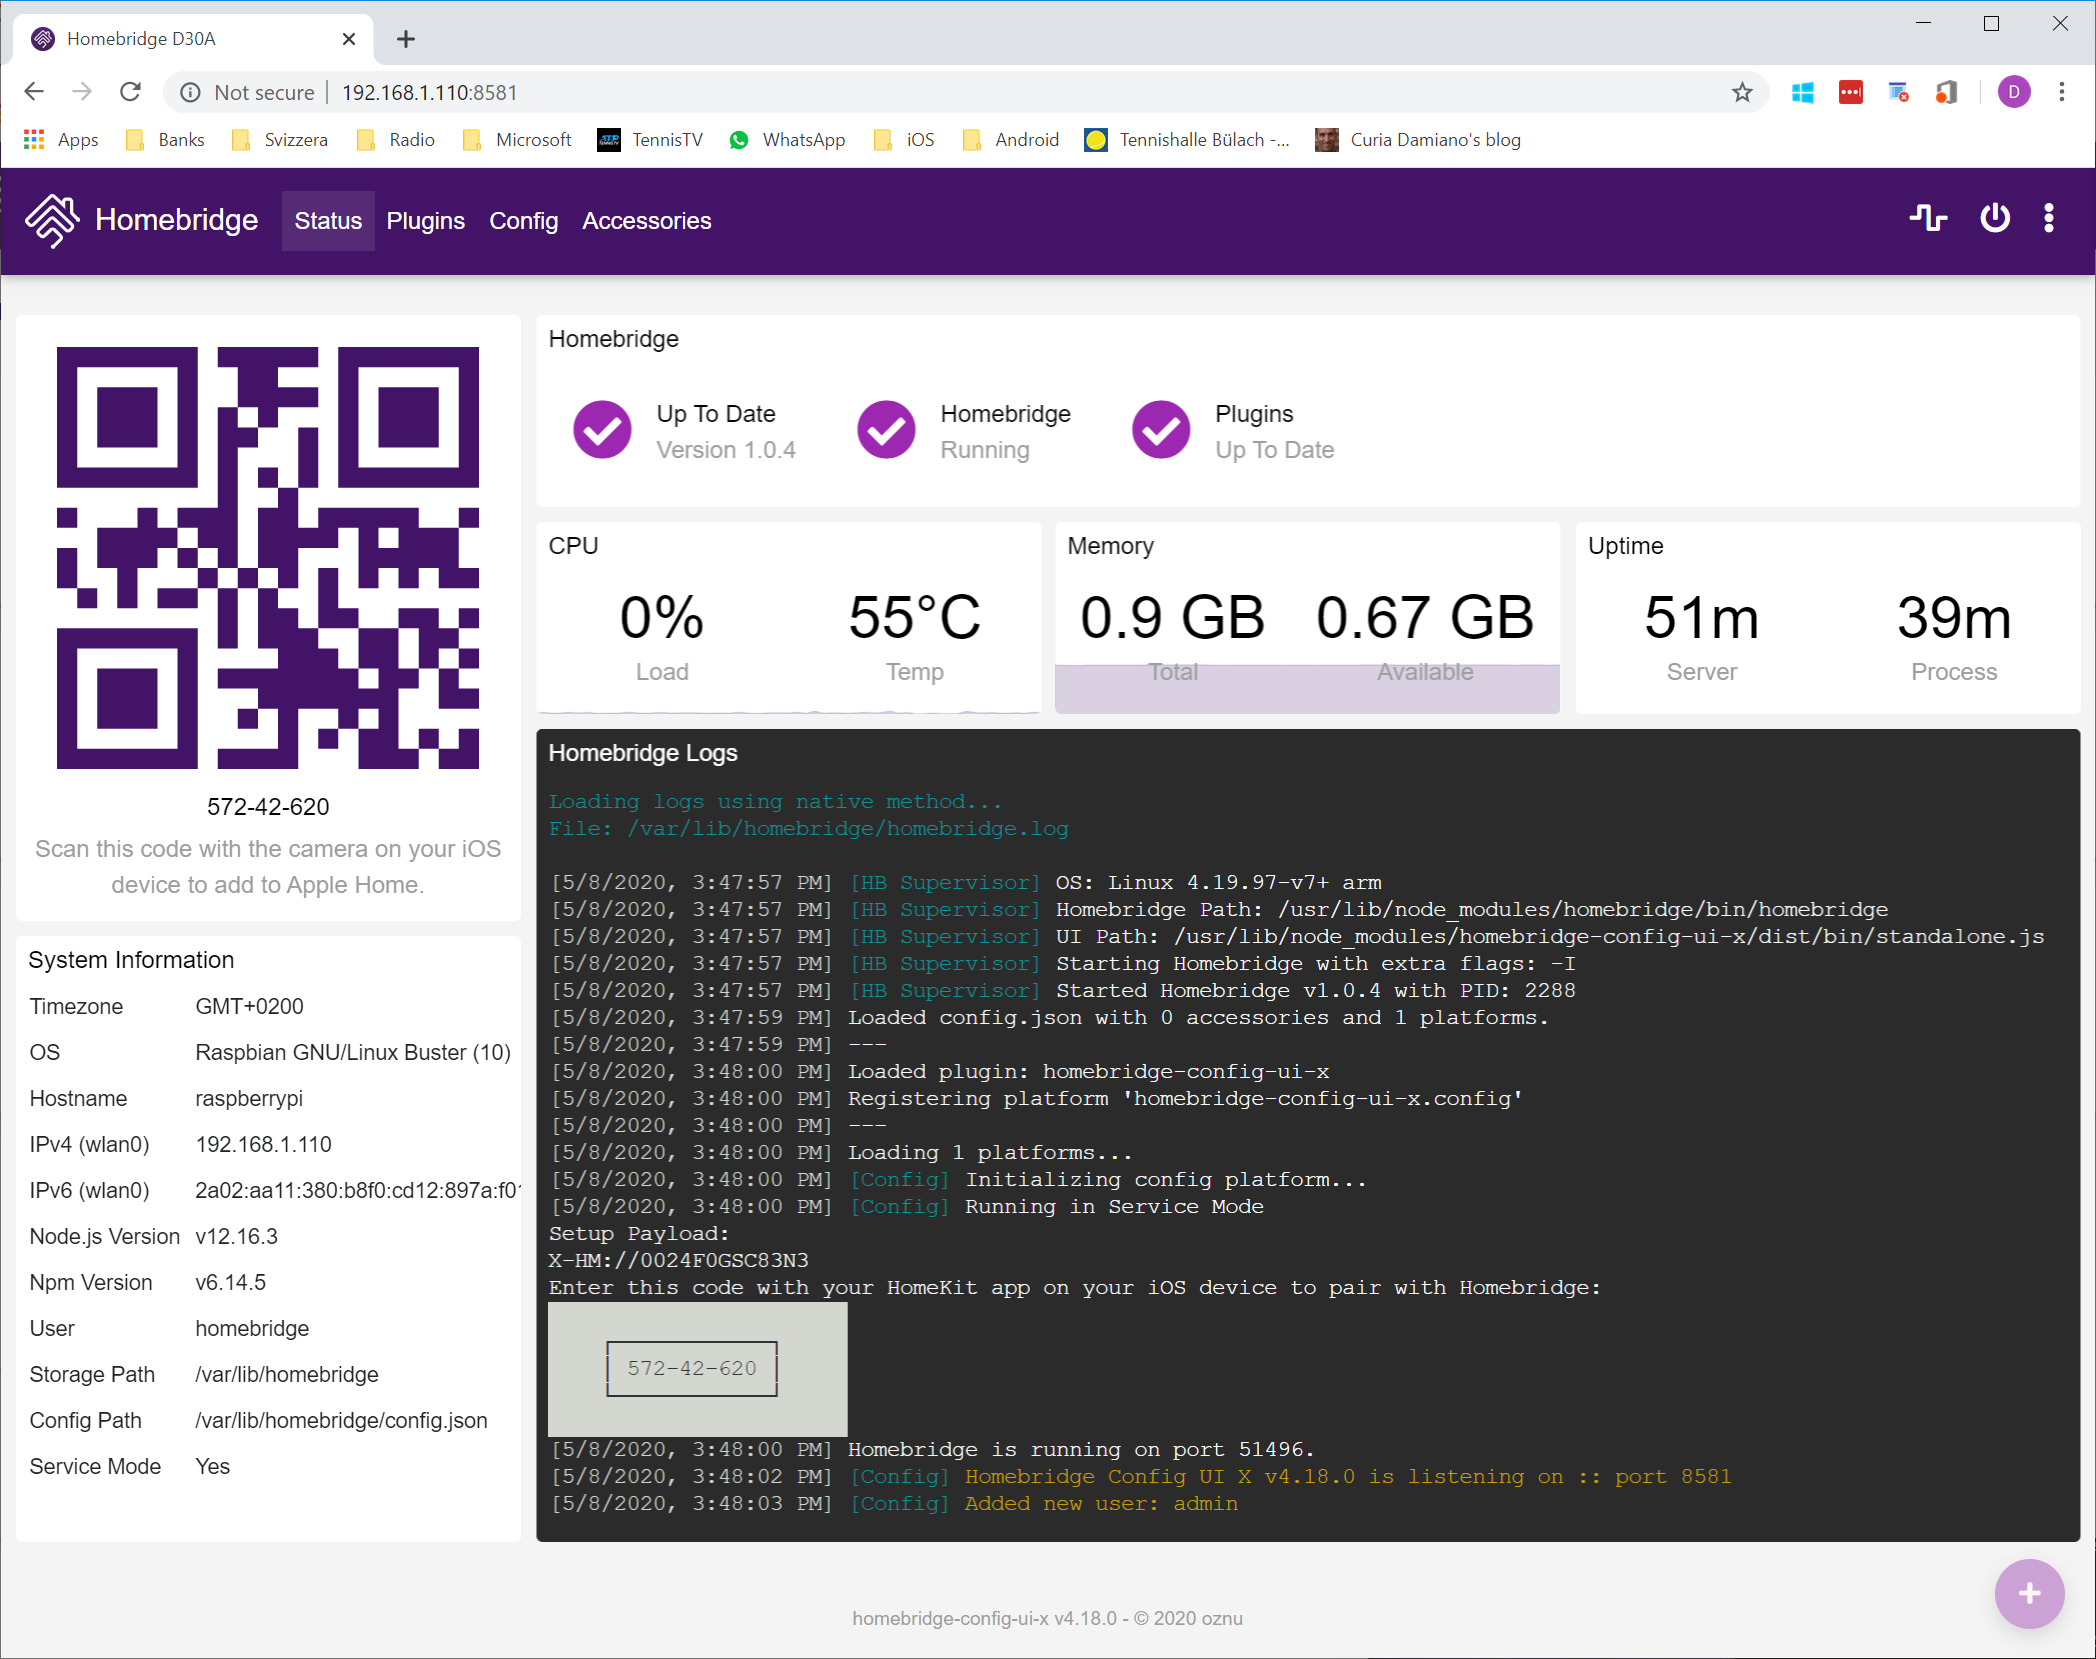
Note that from this UI you can conveniently update HomeBridge itself plus its plugins.
Logitech Harmony plugin
Once installed the Homebridge server, now you have to add a plugin for each device you want to integrate.
In my case, so far I need to integrate only the Logitech Harmony, a device used to control TV, Xbox, Amplifier, Blue-Ray reader and much more.
From the Plugin tab, search for Harmony:
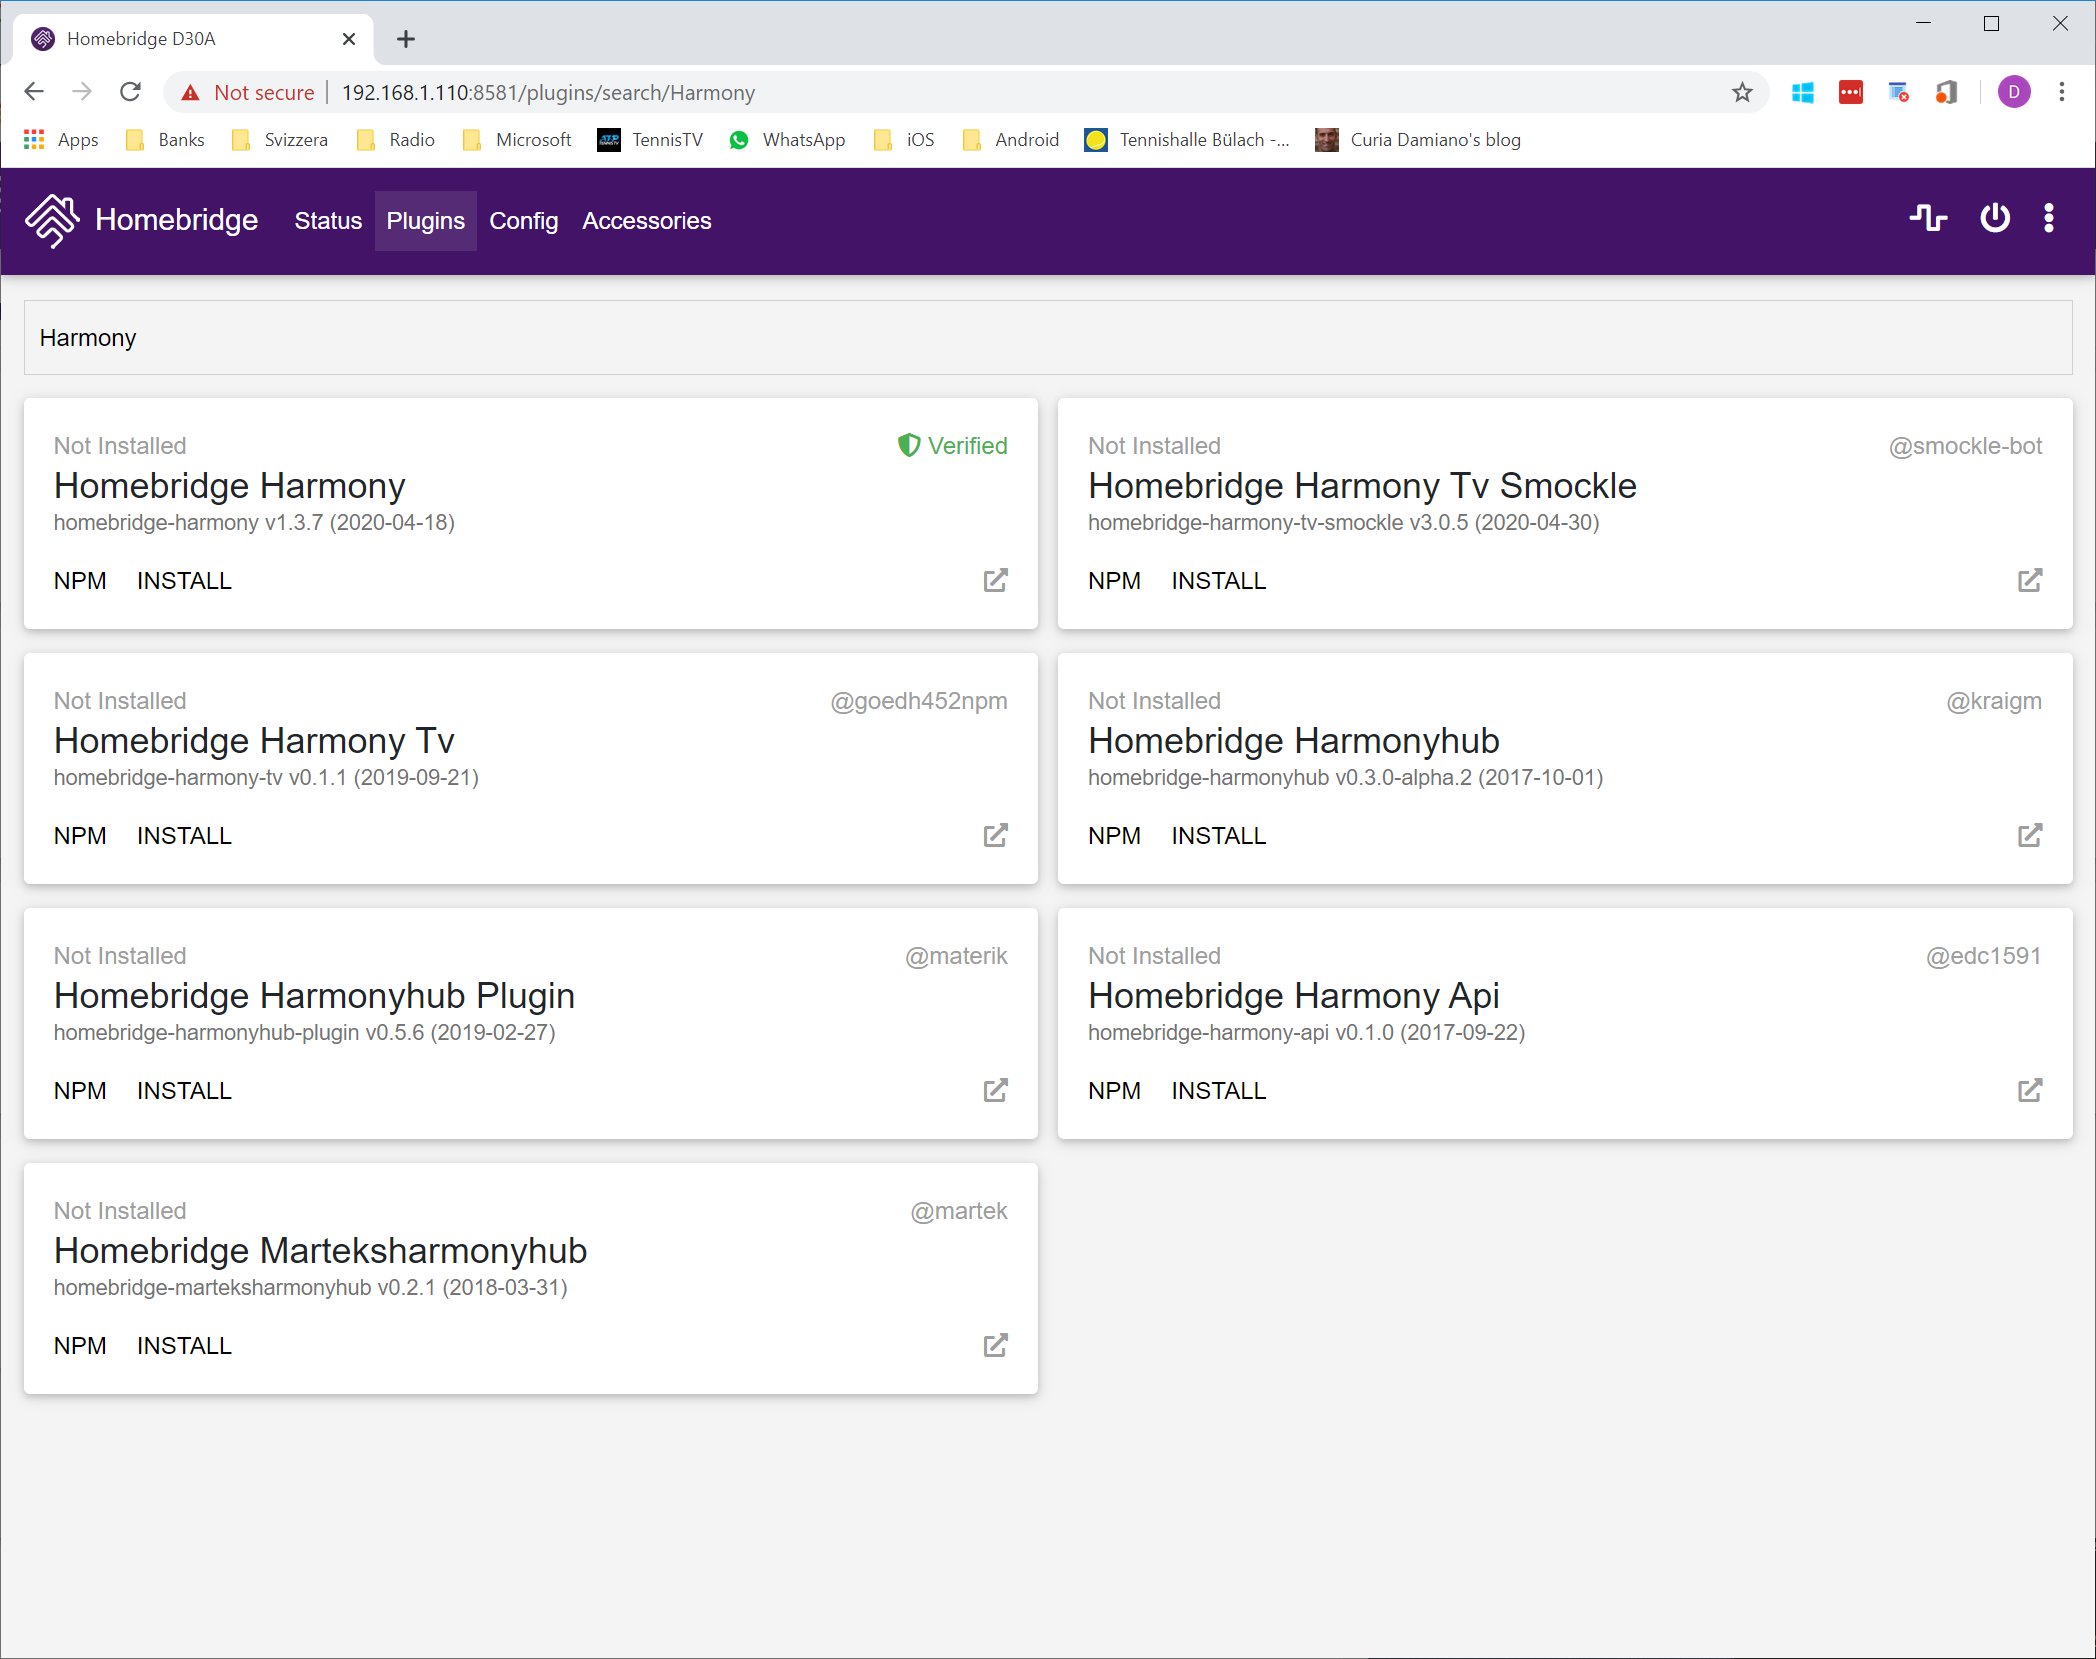
As shown in the above picture, you will find multiple results. I would suggest choosing the first plugin, that seems to be the most updated and supported.
Once installed, you will be asked a few parameters:
- Name: the default name in the plugin documentation is HubName;
- IP Address: you can find from the Harmony iOS app, under About | Versions | Hub IP Address;
- Hub Name in Harmony App: in my case it is Harmony Hub.
These values will be used to fill-in the Json config file, that you can access from the Config tab.
The configuration file is documented in the Npm repository.
With the default configuration file, HomeKit adds a single TV accessory with multiple inputs, one for each Harmony Hub activity. I didn't find it user friendly at all.
So I have changed it, to expose the various activities as individual switches:
{
    "name": "HBR",
    "hubIP": "192.168.1.146",
    "hubName": "Harmony Hub",
    "DELAY_BEFORE_RETRY_AFTER_NETWORK_LOSS": 60000,
    "HUB_CONNECT_TIMEOUT": 10000,
    "HUB_SEND_TIMEOUT": 30000,
    "cleanCache": true,
    "publishAllTVAsExternalAccessory": true,
    "TVAccessory": true,
    "sortInput": 0,
    "configureAccesscontrol": true,
    "playPauseBehavior": true,
    "switchAccessories": true,
    "publishGeneralMuteSwitch": true,
    "publishGeneralVolumeSlider": true,
    "publishGeneralVolumeSwitches": true,
    "linkVolumeControlToTV": true,
    "publishSwitchActivitiesAsIndividualAccessories": true,
    "showCommandsAtStartup": true,
    "otherPlatforms": [
        {
            "TVAccessory": false,
            "sortInput": 0
        }
    ],
    "platform": "HarmonyHubWebSocket"
}
Add to HomeKit
Once finished the configuration, you can go back to the Homebridge homepage, where you will be presented a QR code.
From the Home app on your iPhone, click "+" on the top right corner, Add Accessory, and scan the QR code.
This will add the bridge to the Home and (with my configuration above) a switch accessory for each activity.
Now, you can also use this accessories in your HomeKit scenes.
I have also renamed the accessory in HomeKit:
- from "Watch Apple TV" to "Apple TV";
- from "Play Xbox One X" to "Xbox One X"
In this way, I can say "Hey Siri, switch on Apple TV"